Special Stock Motion Graphics Effects

by

28 July 2023

Dev & Design

Motion Graphics

Video content is more popular than ever before. Netflix has popularised the idea of binge-watching our favorite TV shows while video-sharing social platforms like YouTube and TikTok have seen the format reach new heights.

While more people are watching videos today, we’re also seeing more people creating them. This is due to both the availability and accessibility of modern video editing platforms and the ease at which they can be uploaded online and shared with the world. If you want to start making your own videos, making use of motion graphics can be a fantastic way to stand out from the crowd.

Let’s take a look at some of the best special stock motion graphics effects and discuss how they can be used in your videos.

1. Lower thirds
 lower thirds of motion graphics

As the name suggests, lower thirds of motion graphics appear in the lower third section of your video. These play an important role; they can be used to convey key information without distracting the viewer from what’s happening in the center of the screen.

We see lower thirds of graphics all the time, often far more regularly than we realize. For example, when watching a news bulletin, the lower thirds of graphics are used for things like naming an on-screen speaker, summarising a current news story, or providing breaking updates from across the world. In the news, these lower-thirds graphics are referred to as chyrons.

If you’re an amateur video maker, chances are you’re not going to be tasked with editing news shows for terrestrial television. So, what else can lower thirds be used for?

On platforms like YouTube, growing a following of subscribers is important, and generating lots of comments and likes on your videos can help it perform better in search results and in recommended content. Lower thirds of graphics can be used as calls-to-action, encouraging viewers to subscribe to your channel, to like the video, or to comment and start a discussion among other viewers.

Lower-thirds graphics can also be useful if you’re making informative content like tutorials. They can be used to convey further information to your viewers and to deliver tips, tricks, and reminders, without obscuring the primary focus of the video itself.

2. Overlays

Motion graphics effects come in a huge variety of different styles, whether you’re looking for CapCut effects or Premiere Pro effects.

 One type of motion graphic effect you’re going to come across is the overlay effect. As the name suggests, overlay effects are placed over the main section of the screen, unlike lower-thirds effects which are localized to the bottom of the screen.

What are overlay effects used for? This is a broad question, there is such a range of overlay effects out there, and each can be utilized to serve a different purpose.

Text overlays are among the most common types. These place text directly in the center of the screen and can be used for transitioning between scenes or to deliver vital information to the viewer.

Overlay effects can also include things like graphs, charts, and infographics. These are particularly common in corporate videos and in marketing material, they can be used to clearly and concisely convey complicated information in an engaging and informative way.

Using an overlay effect can also be an artistic choice. They can filter footage to make it look more cinematic, with added depth and grain, or to change the color balance to suit the mood and atmosphere of your video.

3. CapCut
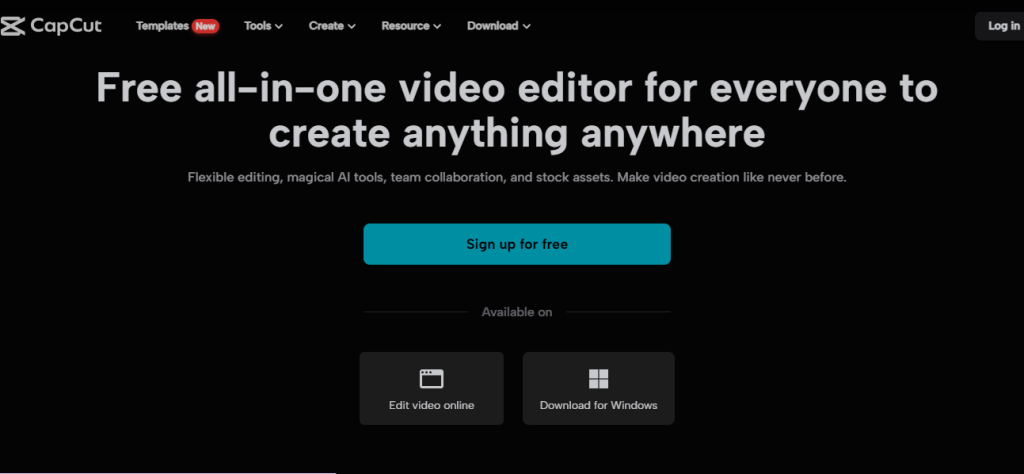
capcut

CapCut is a video editing app made by TikTok parent company ByteDance. With over 200 million monthly users, it’s one of the fastest-growing apps in the world and is taking full advantage of the booming video creator marketplace.

CapCut offers deep editing functionality, but the focus is on encouraging users to edit fun, engaging videos quickly and to share these across social media. One of the best ways to make your videos more engaging and to help them stand out in an increasingly oversaturated digital landscape is to use CapCut motion graphics.

These can come in the form of small, animated figures that dance and move around, giving your content a playful, casual feel that will make your viewers feel happy and comfortable.

CapCut motion graphics can also include things like arrows and pointers. These can be particularly useful for information tutorial videos, where certain elements might need to be highlighted to help viewers follow the tutorial correctly.

4. Slideshows

Slideshows are perhaps the most basic form of motion graphics, but they still have a place in today’s world.

Slideshows are simple sequences of images. They can be used to tell a story, convey a message, or simply show off some exciting, eye-catching images. Much of the creativity in slideshows comes from the transition effects used as one slide moves to the next. However, be careful not to overdo it with these transitions, as this can detract from the content of your slideshow.

Conclusion

Motion graphics are an incredibly important part of video editing. Use this guide to learn all about the different types and how they can be used in your videos.

Read Also:

Arnab is a professional blogger, having an enormous interest in writing blogs and other jones of calligraphies. In terms of his professional commitments, He carries out sharing sentient blogs.

View all posts

Leave a Reply

Your email address will not be published. Required fields are marked *

Related

Printing Quality

Advance Copier: Printing Quality Business Cards On Your Own Computer

There is a relatively small list of things necessary to design and print business cards of your own without the help of a commercial printing company or advance copier. These things include common types of software, access to a laser or inkjet printer, business card stock. Generating business cards yourself can often yield real savings in both money and time, especially when all that is needed is a set of temporary cards or just a small number of cards. The card quality that can be achieved is more than sufficient for hobbyists or home-based entrepreneurs. Of course, if a large volume of cards is required, it is worth making specific price comparisons between DIY cards and professionally printed ones. Printer cartridges are not cheap, and if you plan to make a lot of cards, the expense can accumulate quickly. It is easy to purchase perforated, blank business card stock at most office supply retailers. There are numerous design software options for business cards both online and in stores. It may be that your existing word processing software has an integrated business card template that can make everything quite easy. The choice is yours. Essential Business Card Printing Supplies: Most office supply stores stock perforated sheets specifically made for business card printing. It is often possible to find a number of available choices in terms of colors and paper finish styles. Select and, if necessary, install the business card design program onto your computer. Those with older versions will want to locate the business card template by moving toward the "Tools" tab, choosing "Letter and Mailings," and then selecting "Labels." From there, it is necessary to choose the correct brand name of the business card stock purchased. Word versions that are from 2007 or later will click on the tab entitled "Mailings," choose "Labels" at the upper left, go to "Options" in the dialog box and select the card manufacturer, product number, and printer. Designing The Cards: Once you begin designing a business card, you will want to determine which printing method to use. Process colors or spot color may be best if you want to take your design to a commercial printer. Of course, cards that have been designed on Publisher are printable on your own desktop or sent to a professional printer, based on your unique needs. Take a close look at some of the business cards you have received along the way or check out some online examples so that you can have a strong grasp of the important elements of design. That way, your cards will turn out to be extremely appealing to the eye. Be sure to follow the software program's instructions for designing a card. You will want to include relevant text, a border, perhaps a logo, and additional elements of design, as needed. Name your file and save it in a location you can easily remember and retrieve. To steer clear of irritation and disappointment, be sure to grasp the limits on what your home printer can really do. It must be remembered that professionally printed cards will likely utilize a range of processes and techniques, based on the design chosen. These could include raised printing, engraving, foil stamping, graduations and more. Obviously, these types of enhancements cannot be recreated with a home printer. Some of the essential elements of any home-produced business card include: Name and perhaps a logo of the company Your own name and formal title within the company The physical address, telephone, and fax numbers Email contact information Address of company website Printing The Final Product: If you are not using the best printer, ink type and paper quality, your brilliant designs will not reflect into successful physical products. Most businesses make the mistake of investing in the graphic design part, while compromising on the final print quality. This is something that should be avoided at all costs. Make sure that whenever you are going to print business cards, you are doing it using the highest quality printers, inks/dyes and the best paper. This is what will help you achieve top-notch results for your business cards. Now it is time to load the perforated sheets into your own printer, taking care to follow the instructions provided with the product. Go to the file containing your design and choose "Print," which is typically found under the "File" tab. Run a practice print job of one sheet just to make sure that the design is well-aligned, prints clearly and looks the way you want it to. After this, print the rest of the sheets until you have the number of cards desired and then tear at the perforation lines. Verify that sufficient ink is available to create the full quantity so that you do not end up wasting the prefabricated card sheets. Also, take care to sit near the printer for the entire process so that you can keep an eye on print quality and address mechanical jams that can arise. The type and weight of business cards that can be done at home are limited due to the capabilities of most personal printers. If card material that is heavier than the printer can handle, jamming and potentially permanent damage can occur. Depending on the type of enterprise involved, using home-printed business cards may not be the wisest option, merely because they may be viewed as the mark of an amateur in the relevant industry. However, for certain other purposes, they fit the bill perfectly. If you are searching for an advance copier or printer for your business card needs, consider Advanced Business Copier, the #1 choice. Read Also: 7 Ways To Stop Spending So Much On Printing In Your Business How To Choose The Best Printer For Your Office Paper Authority: Basic Tips In Purchasing A Printer

READ MOREDetails
Web Flow Designer And Editor

Key Differences Between A Web Flow Designer And Editor

Webflow is a website-building platform that provides a user-friendly interface, enabling users to design and develop websites without programming knowledge. Webflow offers a wide range of features to make the website-building experience enjoyable and efficient. Two commonly used tools in Webflow are the Webflow flow designer and the Webflow editor. Although they are both integral parts of the Webflow platform, they are quite different. Thus, understanding the key differences between webflow editor vs designer will help you to make the most of the Webflow platform. This article explores the key differences between web flow designers vs editors. Webflow Designer Overview Webflow Designer is an intuitive, easy-to-use tool for creating stunning websites. Its drag-and-drop interface makes it suitable for professional web developers and beginners. It is responsible for the design of the layout, colors, fonts, and other elements that constitute the visual appearance of your site. Users can customize their design using the extensive library of website design templates and components that gives them unlimited options for web design. You can also use this tool to customize your website to fit your needs and preferences by creating visual elements like buttons, images, text, headers, menus, and more without learning code or syntax. Additionally, Webflow designer allows users to add any desired functionality to their sites, giving them complete control over their website structure. Although experienced developers can further customize their design using CSS, additional tools are not necessary. Webflow designer gets the job done perfectly. Webflow Editor Overview Webflow editor is a content management system (CMS) on the Webflow platform. It allows Webflow developers to edit and manage website content. Its easy-to-use interface allows you to create blog posts, web content, page descriptions, and landing pages without a hassle. This tool is not tied to the website structure, so you can manipulate content without changing the site’s structure or design. As such, content managers and marketers can create and manage content on the CMS without accessing the site’s core elements. Moreover, you don’t need to consult the developers and designers to create or manage content. Thus, the CMS saves you time by reducing the points of contact and makes content management flawless. Webflow editor is also an SEO-friendly tool. It allows you to optimize your website content and pages for search engines, making ranking much easier. For instance, you can optimize the page URL, meta title, and description tags for your keywords. Doing so increases the visibility of your content to search engine crawlers and gives you an edge over your competitors. The Key Differences Between A Web Flow Designer And Editor WebFlow Designer and Editor are powerful tools that allow users to build and maintain a website. However, they are distinct in their core functions and capabilities. The two terms can be confusing, especially if you are a beginner on the platform. The following differences between web flow designer vs editor will help you distinguish them so that you can use them for the best web-building experience. Functionality Webflow Designer is a visual tool that lets users design their websites from the ground up. It has numerous features, such as drag-and-drop building, custom CSS and HTML control, and a wealth of pre-built blocks and elements. WebFlow Editor, on the other hand, is a content management system (CMS) that provides an interface for creating and managing content. It offers the ability to add, edit, delete, and sort content without altering the base design of the website. With the editor, users can add pages, posts, images, and other media items to their site and set up menus, sidebars, and other customizable features. Room For Coding One exciting feature of the Webflow designer is the drag-and-drop functionality that lets you create a professional-looking site even without coding knowledge. Nevertheless, the designer allows programmers to add their code to the existing templates. This option is excellent for customization, so you can tune your site design to fit your preferences. However, the Webflow cms editor does not have the option for additional code. The reason is that the CMS doesn’t require a user to change the website design or the core structure. You can add only content blocks such as text and images – that don’t need programming. Learning Curve Another factor differentiating Webflow designer vs editor is the training curve involved in learning the two tools. Although Webflow is easy to use, the Webflow designer is harder to learn than the editor. This is true, especially if you want to design a professional site. You might want to learn tools like CSS and HTML to create custom elements for your site. The Webflow editor is easier to use and doesn’t require learning many concepts. The CMS has user-friendly features that make content management less taxing. Collaboration Another factor to consider when distinguishing a Webflow designer vs editor is collaboration ability. The Webflow designer is for web developers and designers and does not allow members to collaborate when working on a site. On the other hand, the Webflow cms editor allows members of your marketing team to edit and optimize content. Content writers, SEO experts, and marketers can collaborate and undertake marketing campaigns, increasing efficiency and effectiveness. Final Thoughts Webflow is a user-friendly platform for building professional websites. It has two main tools – Webflow designer and editor that make modern web development easier than ever. The Webflow designer is responsible for the web design, while the editor is a cms for creating and managing website content. Read Also: Key Components for Your Marketing Stack How To Foolproof Your Digital Marketing Strategy? Why Email Marketing is the BEST Digital Marketing Outreach in Singapore

READ MOREDetails
Website Design Company

Tips on Building Your Resume for a Website Design Company

Have you ever spent too much time staring at a blank document, just wondering how you can start your resume? Whether it’s your first one or your twentieth attempt, it’s safe to assume that you’re not unfamiliar with the concept of a resume. A website design company or best website design agencies will always seek for your technical skills in your resume before they hire you. Alright, now how about this: Are you someone looking to work in the tech industry? Or have you already found a stable job and you just want to know how to keep your resume updated? Because in this current market, nothing is secure. Much as you tried to prepare for the best, you also have to brace yourself for the worst. For a company to consider your application, your resume has to blow the socks off the employer. If done correctly, you can market yourself through your resume.  Tips on how to build your own resume for a website design company There are several tips you can follow for developing a resume for a website development company. You just need to follow these steps one after the other. 1. Research A lot of employees try to make one generic resume for all applications. That’s not exactly wrong, but there’s a better way to do it, and that’s to tailor each of your resumes to the company you’re applying for. Look at the job description carefully and try to see if it really does fit you and if your experiences will make you a strong candidate for the position. Research about the company and find that sweet spot on how you can tailor the voice and tone of your resume to speak to them. 2. Format Keep in mind that the hiring managers have probably seen hundreds of applications which may even have some of the best resume templates. Chances are, they are also experts in web design themselves. Making your resume flashy isn’t going to cut it. These people have seen the best in the same way that they’ve also seen the worst. Your resume has to stand out from the hundreds that they get. And how are you going to do that if you’re not supposed to be too flashy? Follow these guidelines: Keep it trendy but not too ornate. Keep the design functional but comfortable to use. Go for timeless designs and color schemes. Use easy-to-read fonts. Make use of headers for easy navigation. Strategically placed white blocks make it easy on the eyes. As for the information you need, make sure to include the following: Full legal name Contact information A professional summary Skills Job experiences Education Achievements Remember, you’re applying to be a web designer. So keep your resume design clean and straightforward, but not too basic that it underwhelms your skills. 3. Achievements Website design company hiring managers will focus on finding people who’ll help grow the company. They are also looking for candidates who can address specific problems they’re going through. You don’t necessarily need to give them a list on how you fit their descriptions to a T. What’s important is how your job experiences can help them address their problems. When talking about your job experiences, try not to give them too much of a description. Instead, tell them about what you accomplished during the time you were in that position. Your accomplishments are your own personal victories. It shows so much about how professional you are and your work ethics. 4. Remove Pronouns It may sound too simplistic but there are some who still forget. No “I’s,” “He”, or “She.” Write everything in plain no-pronoun-first-person POV. For example, instead of saying, “I raised customer satisfaction up to 35%.” you say, “Raised customer satisfaction up to 35%.” It sounds concise and avoids redundancy. 5. Technical Skills Since you’re applying for a web design position, you should reserve an entire section just for your technical skills. Here are a host of the skills most hiring managers are looking for in a web designer: UI/UX design Marketing Social media management SEO Design skills using Photoshop, Premiere, and Illustrator HTML and CSS familiarity Project management skills As a web designer, your technical skills are the major players in your resume. These could be the deciding factors in getting that initial interview. Conclusion Sure, you may feel like as a web designer, you won’t ever run out of clients to attend to – that jobs are simply lined up and waiting for you because you belong in a very in-demand market. That may be true, but at the same time, wouldn’t you want to be more in charge of your work, of your hours? With the right resume, you can negotiate. Why not see how far you can go by giving your resume a little revamp? Read Also: How To Design An Effective Company Website Top 8 Advantages Of Effective Web Design And Development

READ MOREDetails